COMPUTER SYSTEMS NOTES (BASIC COMPUTER PRACTICES AND MAINATANCE SKILLS FOR STARTERS-PART ONE)28/8/2021 COMPUTER SYSTEMS NOTES (BASIC COMPUTER PRACTICES AND MAINATANCE SKILLS FOR STARTERS-PART ONE)
Starting up a Computer
The process of starting up a computer is referred to as booting. Booting can also be defined as the initial set of operations that a computer system performs when electrical power is switched on. There are two types of booting namely: cold and warm booting
How Computers Boot Up
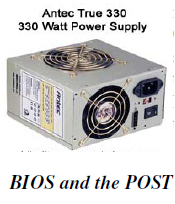
Once the computer and its components have received ample power and the power supply reports no errors it sends a signal (using transistors) to the motherboard and the computer processor (CPU). While this is happening, the processor will clear any leftover data in the memory registers and give the CPU program counter that tells the CPU it's ready to process the instructions contained in the basic input/output system (BIOS).
BIOS and the POST
When the computer first looks at the BIOS, it begins the power-on self-test (POST) sequence to make sure the components in the computer are present and functioning properly. If the computer does not pass any of these tests, it will encounter an irregular POST. An irregular POST is a beep code that is different from the standard one or two beeps. For example, an irregular POST could generate no beeps at all or a combination of different beeps to indicate the cause of the failure. If the computer passes the initial POST, it will next look at the memory located in the complementary metal oxide semiconductor (CMOS) chip, which is kept alive by the CMOS battery even when the computer is turned off. This chip contains information such as the system time and date and information about all the hardware installed in your computer. After loading the CMOS information, the POST will begin inspecting and comparing the system settings with what is installed in the computer. If no errors are found it will then load the basic device drivers and interrupt handlers for hardware such as the hard drive, keyboard, mouse, floppy drive. These basic drivers allow the CPU to communicate with these hardware devices and allow the computer to continue its boot process.
Next, the POST will check the real-time clock (RTC) or system timer and the computer system bus to make sure both of these are properly working on the computer. Finally, you'll get a picture on your display after the POST has loaded the memory contained on the display adapter and has made it part of
the overall system BIOS. Next, the BIOS will check to see if it's currently performing a cold boot or warm boot (reboot) by looking at the memory address 0000:0472, if it sees 1234h the BIOS knows that this is a reboot and will skip the remainder of the POST steps.
If 1234h is not seen, the BIOS know that this is a cold boot and will continue running additional POST steps. Next, it tests the computer memory (RAM) installed in the computer by writing to each chip.
With many computers, you'll know it's performing this step if you see the computer counting the total installed memory as its booting. Finally, the POST will send signals to the computer floppy, optical, and hard drive to test these drives. If all drives pass the test, the POST is complete and instructs the computer to start the process of loading the operating system. Booting the operating system
After the computer has passed the POST, the computer will start the boot process. This process is what loads the operating system and all of it’s associated files. Because Microsoft Windows is the most commonly used operating system, this section will cover the process of loading Microsoft Windows.
The BIOS first hands control over to the bootstrap loader, which looks at the boot sector of the hard drive. If your boot sequence in CMOS setup is not setup to look at the hard drive first, it may look at the boot sector on any inserted floppy disk drive or optical disc first before doing this. In this example, the Microsoft Windows XP NT Loader (NTLDR) is found on the boot sector and tells the computer where to find the remaining code on the hard drive. Next, Windows loads the ntdetect.com file, which displays the Windows splash screen and loads the Windows registry. After loading the registry, Windows begins to load dozens of low-level programs that make up the operating system into memory. Many of the initially loaded programs are what allow Windows to communicate with the essential hardware and other programs running on the computer.
After the registry has loaded the initial basic hardware devices, it begins to load Plug and Play devices, PCI, and ISA devices. After loading all these devices, Windows then moves to loading full support of the hard drive, partitions, and any other disk drives and then moves to all other drivers that have been installed.
Finally, after successfully completing the above steps any additional required services are loaded and Windows starts. Hardware devices communicating with the computer
After the computer has loaded the operating system, hardware attached to the computer must be able to communicate with the CPU. Hardware communication is done by using an interrupt request (IRQ).
Each time a hardware device needs the attention of the computer the interrupt controller sends the request (INTR) to the CPU so it temporarily stop what it is doing to process the request of the hardware device. Anything that was being currently done by the CPU is put on hold and stored as a memory address in the memory stack and is returned to after the interrupt request is processed. All these processes make computers take time before they are ready for use. Factors that slow boot up process
Shutting down a computer
Always follow the correct procedure when shutting down a computer. Failure to do so can result to loss of unsaved information, damaging the hard disk surface and computer programs.
To shut down a computer proceed as follows:
The keyboard
QWERTY keyboard described according to the arrangement of letters on the keys, is the most commonly used keyboard in Kenya. This keyboard exists in two interfaces namely: actual and virtual keyboard.
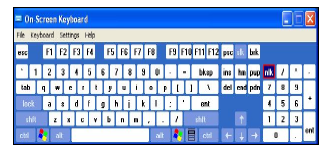
Actual keyboard is used by majority of people who are not disabled. Virtual keyboard-is a software component that allows a user to enter characters. A virtual keyboard can usually be operated with multiple input devices, which may include a touch screen, an actual keyboard and a computer mouse. On a computer, one purpose of a virtual keyboard is to provide an alternative input mechanism for users with disabilities who cannot use a physical keyboard. Another major use for an onscreen keyboard is for bi- or multi-lingual users who switch frequently between different character sets or alphabets. Virtual keyboards are commonly used as an on-screen input method in devices with no physical keyboard,
To use an on-screen keyboard on your windows powered PC, proceeds as follows:
How to use actual/physical keyboard effectively
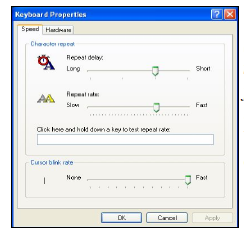
Customizing keyboard settings
The Mouse
This is a pointing device that moves the pointer on the screen when pushed/pulled on a flat surface courtesy of the mouse ball and infrared rays as used by actual and optical mice respectively.
How the mouse works The movement of the mouse on a flat surface corresponds with the direction on the movement of the pointer on the screen. The pointer can change into a cursor when editing text or any other shape depending, which part the pointer is placed on an active window.
When the pointer is placed on an icon, the left button of the mouse is pressed/ clicked to execute a command. A command can either be opening, selecting, running etc. some icons need pressing the left button twice in quick succession for a command to take effect depending on how the computer is set.
This process is called double clicking. To eliminate double clicking, proceed as follows:
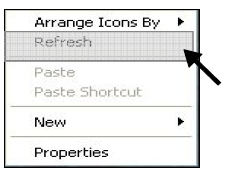
The right mouse button is used to provide a dropdown list of commands to choose from. This list is a shortcut for what is available in the menu bar.
Drag and drop is used to drag windows, pictures and graphs from one position to another and resizing objects. This is possible by clicking on an item using the left button, hold down the button as you move the mouse and then drop the item upon reaching the destination by releasing the button. Its challenging to new computer users but it’s the easiest event to do with a mouse.
Customizing the mouse settings Unlike like the keyboard, the following functions can be changed in mouse settings.
To change these settings, proceed as follows:
Monitor/screen
The screen is supported by a special gadget called a video card/adaptor which is mounted or connected to the motherboard. Since the monitor and an adaptor are hardware devices, they require drivers to support their functionality. A driver is a piece of firmware that acts as an interface between software and hardware systems.
To check weather your video card is working properly, proceed as follows:
Adjusting the appearance of a screen
On front/side or beneath your screen are buttons/wheels used to adjust brightness, contrast, geometry, H(horizontal)- size, V (vertical size)-size, V-position, H-position, language, pincushion (A common type of distortion in CRT monitors in which horizontal and vertical lines bend inwards toward the center of the display.) etc Enhancing the screen resolution and customizing the appearance of the desktop. Customizing display properties on the desktop
You can customize display settings of your desktop using the following procedure:
Changing screen saver
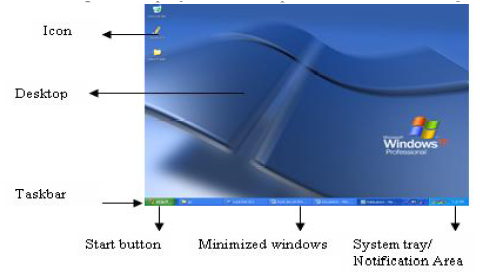
A desktop is a display area that represents the kind of objects one might find on the desktop folder
Appearance display properties
This changes the style, color scheme and font size of windows and dialog boxes on your screen. To change appearance: click on appearance tab from display properties dialog box and customize style from style and buttons drop down list, color scheme from color scheme from color scheme drop down list and font size from font size drop down list. Then click apply to save change.
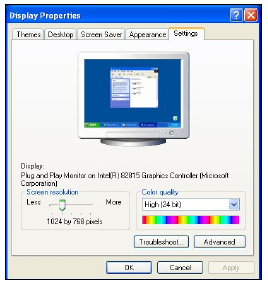
Display resolution or display device is the number of distinct pixels in each dimension that can be displayed.
To change screen resolution, click on settings from the display properties window and adjust the sliding option from screen resolution control. 1024 by 768 pixels is the most preferred resolution by most computer users and good for internet access. Color quality (is a quantitative measure of the ability of a light source to reproduce colors of illuminated objects). To change the color quality scheme, click on color quality dropdown list and select either medium 16 bit or high 24 bit depending on which video graphic adaptor your computer uses. Using My Computer
My Computer shows you the contents of your floppy disk, hard disk, CD-ROM drive, and network drives.
You can also search for and open files and folders, and gain access to options in Control Panel to modify your computer's settings. To open My Computer: Click Start, and then click My Computer. Once My Computer is open you'll see all available drives on your computer. For most users, you'll only be concerned with the Local Disc (C :) drive, which is the hard drive and what stores all your files. Doubleclick this drive icon to open it and view of its contents. 
Tip: If you're looking for a document such as a word processor file you've created, music file, picture, or other personal file it's likely that it's contained in your documents folder. This folder is displayed in My computer as a folder and usually contains your name. For example, if your username was John, this folder would be named John's Documents.
Finding files in My Computer
If you're having trouble finding where one of your files is stored, use the Windows find feature to find the file. To do this from within My Computer either click on File and then Search or right click on the C: drive or other folder you wish to search and click Search.
In the Search window, type the name or part of the name of the file you're trying to find. Adjust system settings with your computer If you wish to manage your computer or view other settings and information about your computer instead of double-clicking the My Computer icon to open it: Right-click on the My Computer icon and click Properties. Performing these steps will open your System Properties (the same window is accessible through the Control Panel). The start menu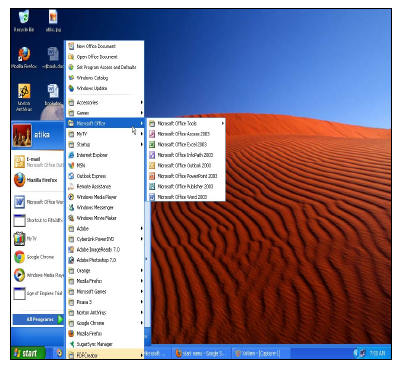
Windows XP includes a new Start menu to provide quick access to frequently used programs and common system areas like My Computer, Control Panel, and Search. This area describes the function of the different areas of the new Start menu.
The left side of the Start menu contains the programs list, which is divided into two sections, the "pinned list" (at the top) and the Most Frequently Used (MFU) list. The two sections are separated by a line. The functions of these lists are as follows:
Pinned list:
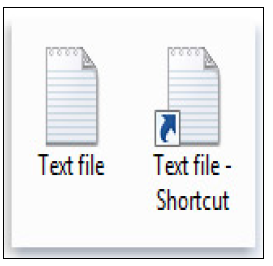
The pinned list allows users to place shortcuts to programs and other items in the Start menu. It will be pre-populated with the user's default Web browser and email program (these can be removed). A program (.exe file) or a shortcut to a program can be "pinned" to the Start menu by right-clicking the item and clicking Pin to Start Menu. Any other item can be added to the pinned list by dragging and dropping it to the Start button or the Start menu. An item can be removed from this list by right clicking it and clicking Unpin from Start Menu or Remove from This List. The order of the items in this list can be arranged by dragging and dropping them to the preferred position. NOTE: If the program or shortcut that was pinned to the Start menu is moved or deleted, the link to it on the Start menu will no longer works. MFU list:
The list of most frequently used programs (MFU list) appears below the Pinned list on the Start menu.
This list keeps track of how often programs are used and displays them in order of most used (top) to least used (bottom). Programs can be removed from this list by right-clicking them and clicking Remove from This List. The order of the items in this list cannot be manually arranged (they are arranged according to how often they are used). At the bottom of the MFU list is the All Programs menu, which displays other programs that are installed. To configure the settings for the Programs list, follow these steps:
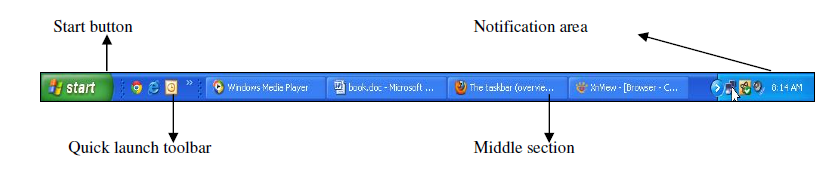
The task bar
The taskbar is the long horizontal bar at the bottom of your screen. Unlike the desktop, which can get obscured by the windows on top of it, the taskbar is visible almost all the time. It has four main sections:
Icons
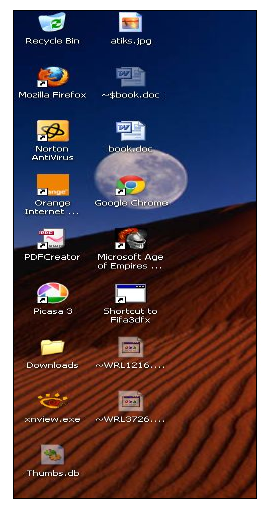
Moving icons around
Windows stacks icons in columns on the left side of the desktop. But you're not stuck with that arrangement.
0 Comments
Leave a Reply. |
Categories
All
AuthorAtika School Team Archives
March 2024
|
 RSS Feed
Can't find what you are looking for? Don't worry, Use the Search Box Below.
|
Primary Resources
College Resources
|
Secondary Resources
|
Contact Us
Manyam Franchise
P.O Box 1189 - 40200 Kisii Tel: 0728 450 424 Tel: 0738 619 279 E-mail - sales@manyamfranchise.com |